
Desserts
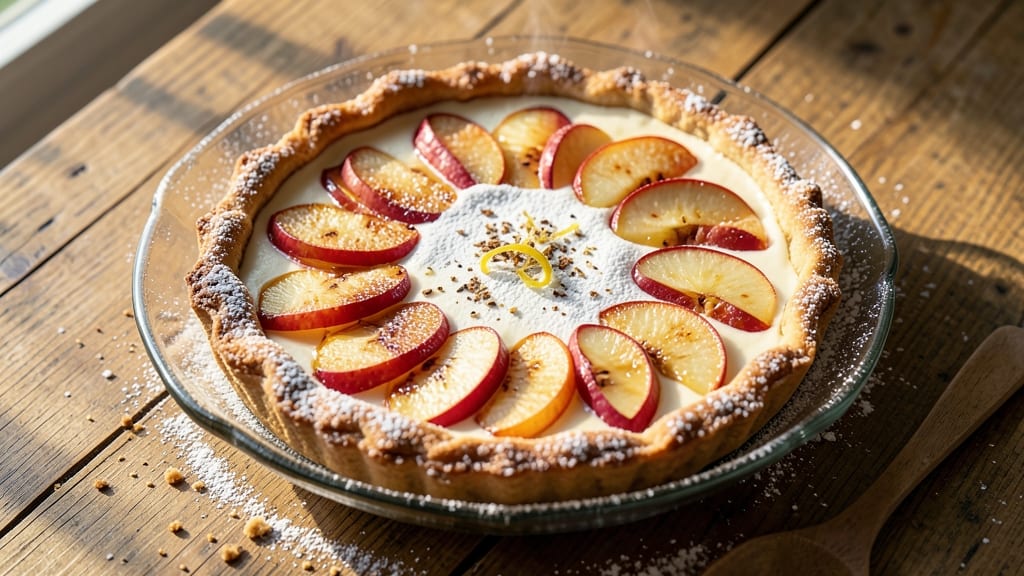
This apple cheesecake tart recipe delivers the perfect balance of creamy cheesecake and spiced apple flavors in every bite. The secret lies in a buttery shortbread crust that holds its shape while providing a satisfying crunch, paired with a rich cream cheese filling that stays lusciously smooth.
I’ve perfected the technique over years of baking, ensuring the apples caramelize just enough to add natural sweetness without overpowering the tangy cheesecake base.
The magic happens in the layers: a crisp, golden crust supports a velvety cheesecake center, topped with tender spiced apples that soften just enough to release their aromatic flavors.
Baking at 350°F guarantees a perfectly set filling with a subtle caramelized edge, while the apples retain their texture for a satisfying bite. This recipe is designed for foolproof results, whether you’re baking for a crowd or treating yourself to an indulgent dessert.
What makes these tarts truly special is the harmony of textures—crisp crust, creamy filling, and tender apple slices—all coming together in one elegant bite. The spiced apple topping adds warmth and depth, making each tart taste like a cozy autumn dessert.
Serve warm with a drizzle of caramel or a dusting of cinnamon for that restaurant-quality finish.
These tarts are perfect for holiday gatherings, potlucks, or a special weekend treat. The recipe scales easily, so you can make a half-batch for two or double it for a crowd. Once you try this combination, you’ll never settle for store-bought again—it’s that good.
Ingredients for apple cheesecake tart
Six ingredients for the crust, seven for the filling, and four for the apple topping—simple buttery layers that pack serious flavor.
| Ingredient | Amount | Notes |
|---|---|---|
| All-Purpose Flour 🌾 | 1 ½ cups | Sifted for light texture |
| Unsalted Butter 🧈 | 1 cup | Cold, cubed for crust |
| Granulated Sugar 🍚 | ¼ cup | Plus 2 tbsp for crust |
| Salt 🧂 | ½ tsp | Fine sea salt preferred |
| Cream Cheese 🧀 | 16 oz | Full-fat, room temperature |
| Powdered Sugar 🍚 | ½ cup | For smooth filling |
| Vanilla Extract 🌿 | 1 tsp | Pure, high-quality |
| Large Eggs 🥚 | 2 whole | Room temperature |
| Apples 🍎 | 4 medium | Sweet-tart variety like Honeycrisp |
| Brown Sugar 🍚 | ¼ cup | Packed for apple topping |
| Ground Cinnamon 🌶️ | 1 ½ tsp | Plus extra for dusting |
| Ground Nutmeg 🌿 | ¼ tsp | Freshly grated preferred |
| Lemon Juice 🍋 | 1 tbsp | Freshly squeezed |
The butter is non-negotiable here—European-style butter like Plugrá or Land O'Lakes works best for that rich, golden crust. If you're using salted butter, reduce the added salt by half. The apples? Honeycrisp or Braeburn are my go-tos—they caramelize perfectly without turning mushy. Most grocery stores carry them, but if you're at Whole Foods, grab the organic ones for extra sweetness. Peel and core them right before baking so they don't brown.
No cream cheese on hand? Substitute with a mix of ricotta and sour cream—it's not identical, but close. Running out of vanilla? Almond extract at half the amount gives a nice twist. For the apples, if you can't find Honeycrisp, Granny Smith mixed with Gala works too. The spices are key—Penzeys or McCormick for the best quality. If you're short on nutmeg, a pinch of allspice works in a pinch. And trust me, the extra cinnamon dusting on top? Worth the minute it takes.
Store the crust dough wrapped in plastic for up to 2 days—it's easier to roll out later. The filling keeps in the fridge for 3 days, but bake it fresh for the best texture. The assembled tarts reheat beautifully—350°F for 10-12 minutes until the filling is just warm. Freeze unbaked tarts for 2 months—just add 5-7 minutes to baking time. And if you make extras? They're perfect for breakfast the next morning.
Why You'll Love This Recipe
- No-Fuss Assembly: I swear by this recipe because it’s basically mixing, pressing, baking. The crust? Just flour, butter, and sugar—no rolling required. You’ll have dough in your hands faster than you can say “apple pie spice.”
- Creamy-Crisp Magic: That first bite—flaky crust giving way to velvety cream cheese filling, then the apples? It’s like dessert hugged comfort food. Honestly, the sugar caramelizing on top makes it taste even better the next day.
- Weeknight or Holiday: Make it for a lazy Sunday brunch or impress guests with minimal effort. Between us, this is my go-to for potlucks—easy to slice, always a hit, and no one guesses it’s this simple.
- Budget Buster: Cream cheese and apples stretch this into a crowd-pleaser without breaking the bank. Leftovers? Even better—slice, reheat, and no one complains. (Yes, even on a Tuesday night.)
Step-by-step instructions for apple cheesecake tarts
Here's how to create these perfect bite-sized desserts with a flaky crust and creamy spiced filling.
Make the Buttery Crust
In a food processor, combine the 1 cup unsalted butter (cold, cubed) with the 1.5 cups all-purpose flour and 0.5 tsp salt. Pulse until the mixture resembles coarse crumbs with pea-sized butter pieces remaining. This texture is crucial for a flaky crust that won't turn tough.
Press the dough evenly into a 9x13-inch baking dish, creating a thin, even layer on the bottom and up the sides about ½ inch high. Use a rolling pin if needed, but don't press too hard or the crust will get compacted. Chill in the refrigerator for 30 minutes while you prepare the filling.
Prepare the Cream Cheese Filling
In a large mixing bowl, beat the 16 oz cream cheese and 0.25 cup granulated sugar on medium speed until completely smooth and creamy. This should take about 2-3 minutes—don't rush it or you'll end up with lumps. The mixture should be pale yellow and completely homogeneous.
Add the 2 whole large eggs one at a time, mixing well after each addition. Then stir in the 1 tsp vanilla extract and 0.5 cup powdered sugar. The filling should be thick but pourable. If it's too thick, add 1 tablespoon milk (though we're not using milk in this recipe, it's a common fix). Cover and refrigerate while you prepare the apple topping.
Create the Spiced Apple Topping
Peel, core, and dice the 4 medium apples into ¼-inch pieces. In a medium bowl, toss the apples with 0.25 cup brown sugar, 1.5 tsp ground cinnamon, 0.25 tsp ground nutmeg, and 1 tbsp lemon juice. Let the mixture sit for 10 minutes while you preheat the oven to 350°F—this allows the flavors to meld and the apples to soften slightly.
Here's the thing—don't skip the lemon juice. It brightens the apples and prevents them from turning brown during baking. The spices should be evenly distributed, and the apples should glisten slightly from the lemon juice and sugar mixture.
Assemble and Bake the Tarts
Preheat your oven to 350°F while the crust chills. Remove the chilled crust from the refrigerator and spread the cream cheese filling evenly over the bottom. Then, arrange the spiced apple mixture on top in an even layer. The apples should cover the filling completely but not overflow the crust.
Bake for 40-45 minutes until the crust is golden brown and the filling is set but still slightly jiggly in the center. You'll know it's done when the edges are golden and the apples are tender enough to pierce easily with a fork. If the top browns too quickly, tent loosely with aluminum foil after 25 minutes of baking.
Cool and Serve
Let the tarts cool completely in the pan on a wire rack for at least 2 hours before slicing. This resting time is crucial—it allows the filling to firm up properly and prevents it from running when you cut into them. The contrast between the warm, spiced apples and the cool, creamy filling is what makes these tarts so special.
Once cooled, dust the tops with a little extra ground cinnamon for presentation. Cut into squares or diamonds and serve at room temperature. These tarts are best enjoyed within 2 days of baking, though they'll keep in the refrigerator for up to 4 days if stored properly in an airtight container.
Pro Tips For Making Apple Cheesecake Tart
- Chill the Cream Cheese: I learned this the hard way—room-temperature cream cheese is not your friend here. Pop those blocks in the fridge for 30 minutes before mixing, or you’ll end up with a lumpy, soupy filling that won’t set right. Trust me, your tart’s texture depends on this.
- Pre-Bake the Crust: This isn’t optional. A 12-15 minute pre-bake at 375°F with a pie weight (or dried beans) prevents a soggy bottom. I know, I know—it’s an extra step, but skip it and you’ll regret it when the crust turns to mush. Yes, even if you’re impatient like me.
- Cut Cold Butter: For the crust, cube the butter and freeze it for 10 minutes before mixing with flour. This keeps the dough from overworking and ensures flaky layers instead of a dense, greasy mess. Sounds weird, but it works—your future self will thank you.
- Use Tart Apples: Granny Smiths or Honeycrisp are your best bets. Sweet apples like Gala or Fuji will turn the filling into syrup. Slice them thin (⅛-inch) and toss with a teaspoon of lemon juice to keep them bright. No one wants a tart that tastes like dessert and wallpaper paste.
Troubleshooting great apple cheesecake tart
Crust Too Crumbly
If your crust breaks apart when pressing it into the pan, it’s likely too dry. The fix? Add 1 tablespoon cold water or 1 teaspoon ice-cold milk to the dough and pulse again in the food processor. Work quickly—don’t let the butter melt!
Chill the dough for an extra 10 minutes before pressing to help it hold together. If it still crumbles, try pressing it into the pan with a chilled glass instead of your fingers for even pressure. 🧈
Filling Too Dense
A dense filling usually means the cream cheese wasn’t softened enough or the eggs were added too quickly. Next time, let the cream cheese sit at room temperature for 30-45 minutes before mixing. Also, beat it on medium speed for 3-4 minutes to ensure it’s completely smooth before adding eggs.
If the filling still looks thick, whisk in 1 tablespoon milk at a time until it reaches a pourable consistency. Overmixing can also cause density—mix just until combined! 🥚
Apples Too Mushy
Overly soft apples can make your tarts soggy. First, make sure your apples are cut into ¼-inch pieces—smaller pieces cook faster and turn mushy. Toss them with 1 tablespoon lemon juice right before baking to preserve their texture.
If they still cook down too much, reduce the baking time by 5 minutes and check for doneness earlier. For extra structure, sprinkle the apples with 1 tablespoon all-purpose flour before baking. 🍎
Filling Not Setting
A jiggly filling after baking usually means the oven wasn’t hot enough or the tarts weren’t cooled properly. Double-check your oven temperature with an oven thermometer—it should read 350°F. If your oven runs hot, reduce the temperature to 340°F.
After baking, let the tarts cool completely at room temperature for 2 hours before refrigerating. If they still don’t set, try baking them for 5-10 minutes longer until the edges are firm. 🌡️
Top Browning Too Fast
If the apple topping browns before the filling is set, tent the pan loosely with aluminum foil after 25 minutes of baking. This traps heat while allowing steam to escape, preventing over-browning. For an extra insurance, brush the apples lightly with 1 tablespoon apple juice or water before baking.
If you’re using a glass baking dish, switch to a metal one—glass can cause uneven browning. 🔥
Cracks in the Filling
Cracks often happen when the filling cools too quickly or the oven temperature fluctuates. To prevent this, avoid opening the oven door during baking. Let the tarts cool gradually at room temperature for 1 hour before refrigerating.
If cracks appear, cover them with a thin layer of applesauce or caramel glaze before serving—it’ll disguise them beautifully! 💫
Nutrition facts
Frequently asked questions
Can I make these tarts without a food processor?
For the crust, use a pastry cutter or two forks to cut the cold butter into the flour until you get pea-sized pieces. Work quickly to avoid melting the butter. For the filling, use a hand mixer or whisk to combine the cream cheese and sugar until smooth, then gently fold in the eggs. The texture won't be as perfectly homogeneous, but it'll still taste delicious.
How do I adjust the recipe for individual servings?
This recipe makes a 9x13-inch tart, perfect for 6-8 servings. For individual tarts, divide the crust dough into 6-8 equal portions and press each into a 4-inch tart pan or ramekin. The filling and apple topping should be divided proportionally—about 1/6 of the filling and 1/6 of the apples per tart. Bake each individual tart for 25-30 minutes at 350°F instead of the full sheet pan time.
Can I use canned applesauce instead of fresh apples?
Yes, but with adjustments! Use 1 cup unsweetened applesauce mixed with 1 tablespoon lemon juice, 1 tablespoon brown sugar, and ½ teaspoon cinnamon. Spread it evenly over the cheesecake filling before baking. Since canned applesauce is pre-cooked, reduce the baking time by 5-7 minutes to prevent over-browning. The texture will be smoother but still delicious.
Why does my cheesecake filling crack?
Cracks usually appear when the filling cools too quickly or the oven temperature fluctuates. To prevent this, avoid opening the oven door during baking and let the tarts cool gradually at room temperature for 1 hour before refrigerating. If cracks do appear, cover them with a thin layer of applesauce or caramel glaze before serving—it’ll disguise them beautifully!
Can I make these tarts ahead of time?
Yes! The crust can be prepped and refrigerated for up to 2 days, and the filling can be made 1 day ahead. For best results, assemble the tarts 4-6 hours before baking and refrigerate uncovered. This allows the filling to set slightly, reducing cracks. Bake as directed, then store leftovers in an airtight container in the fridge for up to 4 days. Reheat individual slices at 350°F for 5-7 minutes to restore warmth.